What is a mobileconfig file?
If you have an iPhone, your IT person might have given you a mobileconfig file to use to configure your phone's email. Mobileconfig is a an automated way to alter the settings on your phone without you having to do it manually. It can be used for all kinds of things such as configuring your iPhone's email settings. This example will show you how to install a mobileconfig profile.
Installation:
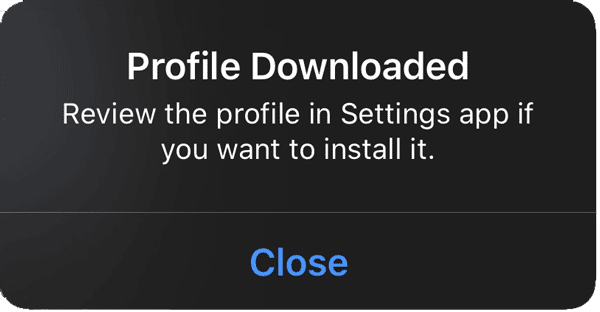 |
If you receive an email or are directed to a webpage that contains your mobileconfig file, your iPhone will download the profile and place it in a special location for later use. This notice is the only indication that you will see alerting you that it happened. |
 |
Open the Settings app on your iPhone. |
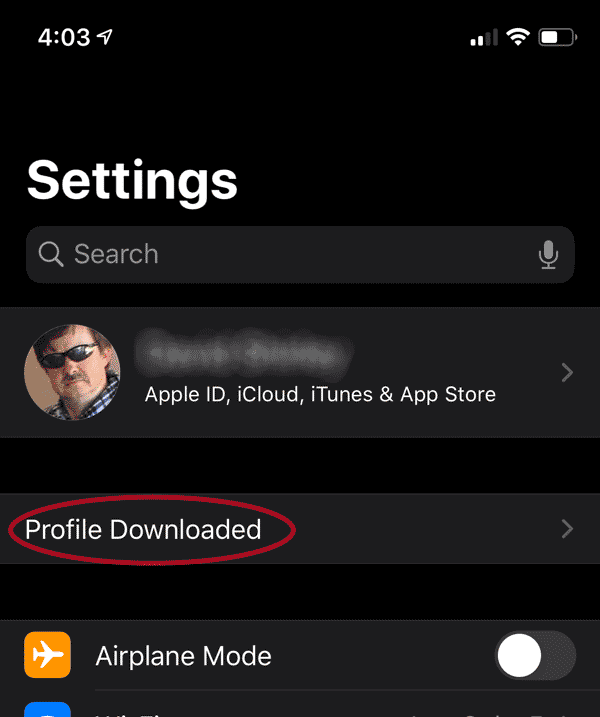 |
Right below your name near the top of the settings app, you will see that a profile has been downloaded. Click on it. |
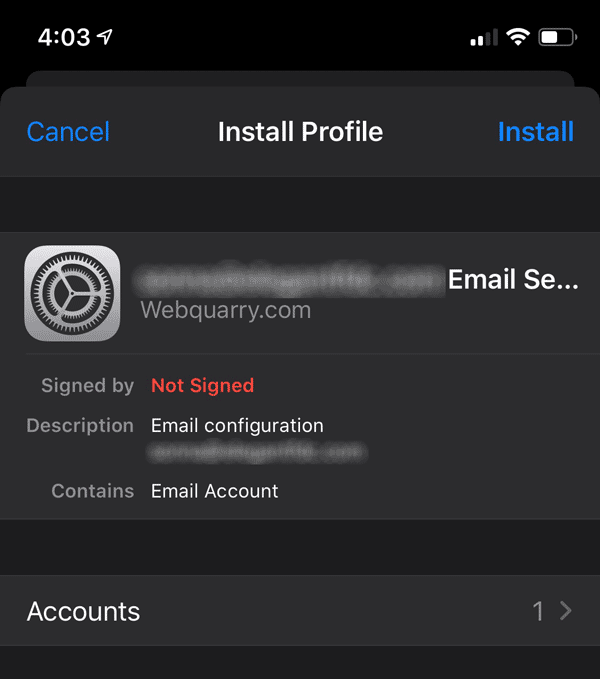 |
You will see a description of the profile and what it contains. You can explore it if you want or just click the Install button in the upper right corner. |
If you receive an email or are directed to a webpage that contains your mobileconfig file, your iPhone will download the profile and place it in a special location for later use. This notice is the only indication that you will see alerting you that it happened.
Open the Settings app on your iPhone.
Right below your name near the top of the settings app, you will see that a profile has been downloaded. Click on it.
- Right below your name near the top of the settings app, you will see that a profile has been downloaded. Click on it.
- You will see a description of the profile and what it contains. You can explore it if you want or just click the Install button in the upper right corner.
- You will be asked to enter your iPhone's passcode.
- If the profile is not cryptographically signed (ours are presently not signed) you will see a warning. Click the "Install" button again in the upper right corner.
- Profile will be installed and you will see a screen confirming that.
Removal:
- Go to "Settings" app and click the "General" tab.
- Scroll down near the VPN stuff and you should see all profiles that you have installed on your device. Click the one you want to remove.
- It will open to confirm that you are looking at the one you clicked. Click it again to open it.
- Click the "Remove Profile" button at the bottom of it and it will be removed.
